When I joined Science Data Processing as Research Data Scientist, there was no data infrastructure that I could just plug into and run a random forest against it. No doubt I’m not the only one with similar experience. I took over a project that someone else has started. My first and that person’s last month overlapped so at least I could ask him questions about the project. The high level description sounded very encouraging. There was a mention about data ingestion, preprocessing and model training. Then I got a link to a github repository. The only ever push to that specific account happened only a day before and consisted of loose python and bash scripts. Anyway, it was a spaghetti code. On top of that all the work was performed on a work laptop and not on our servers. Thus when he left there was not even a trace of the virtual environment he used. In the end I started everything from scratch and never finished it…
There is a purpose in me retelling this story. I could never finish the project I took over because it was impossible to reproduce the environment without configuration files and recreating manual steps for ingest and preprocessing. After this experience I looked for ways to spare my current and future coworkers from this headache. The solution to that is containerization and Docker. In this post I’m going to show how you can start using docker today without building your own image. So that you can get comfortable with the contenerisation concepts and maybe even start sharing your docker images with the community.
Why use Docker?
Docker is one brand out of several container systems, but is the most popular and widely used. It provides everything an application needs to run, like file system and software applications. Out of the following attributes:
- flexible,
- lightweight,
- interchangeable,
- portable,
- scalable and
- stackable
it’s also easy to use, as I will try to prove to you in this post. Docker Hub, an “app store for Docker images”, makes this job very easy. Everyone can package an application on their laptop, or download it from the hub, and run it on any public cloud or private cloud. Lets imagine a typical day at work for a data scientist. She’s working on multiple projects, one deals with geospatial data, another with text data and so on. She has three trainees and she collaborates with a team in Switzerland remotely. She manages all those projects with docker images. Smart! She has custom environments for every analysis and she shares those environments on Docker Hub platform. Easy! No more nightmares with installation of libraries with complicated setups saving hours of your life. No more ‘it works on my laptop’ excuses.
There is a whole ecosystem around Docker. For example, multiple external tools like:
- configuration management tools,
- orchestration tools,
- file storage technologies,
- filesystem types,
- logging software,
- monitoring tools,
- self-healing tools.
To set up Docker on your machine follow the links below:
Terminology
Dockerfile is a text file with the build instructions to build the image. It has ordered list of commands, written in special Docker syntax, just like you would execute on the command line to install a package. This is how Dockerfile automates the process of building an environment.
Image is essentially a disk image. Just as when you back up your laptop you create an image, a virtual disk, that you can mount later to get access to your files. You create this image by executing a Dockerfile and store them as files. This way everything is self-contained and immune to any system-level updates or changes. Image is also the file you share on Docker Hub, more on it later.
Container is a running image. You can run multiple copies of the same image, this is what makes docker images easy to scale.
Extra bit: layers. Each command in Dockerfile creates a read-only layer. A running image, container, has an extra read-write layer on top the read-only layers. When a running image is stopped all those changes made in the read-write layer are lost.
Virtual Machines vs. Containers
Someone compared Virtual Machine (VM) to a house with a nice garden, braai area and a garage. All the bells that you don’t really need. A garage is nice but you wouldn’t like to live in a place without a bathroom. In contrast, docker containers are like block of flats. You can fit so many more families on the same plot. A flat is considerably smaller than a house, but you don’t waste resources on extra maintenance. In a sense you get a bare minimum to run your application, which is a good thing when you have to pay for your resources. This difference comes from the hardware isolation of VMs. A VM utilizes own BIOS, software network adapters, disk storage, a CPU, RAM, and a complete OS. In contrast Docker container is a virtual OS with all the required libraries, dependencies, and resources for easy deployment. A good explanation is given in this post if you would like to know more.
Docker Hub
Docker Hub is like Git, a version control system, for Docker images. The beauty of Docker Hub is that you don’t have to write a Dockerfile to create new containers. After creating a Docker Hub account on the Docker Hub website you can start downloading (pulling) compiled images. It is safer to use official releases, and when you start writing your own Dockerfiles select the image closest to your final application. I will be showing how to search for the images later in this blog post.
At a glance the major features include:
- Image repositories where you will find images from community and official libraries. You can also pull, push and manage your private images.
- Automated builds where new image is automatically created when you make changes to a source code repository.
- Organizations with work groups to manage access to images and repositories.
- GitHub and Bitbucket integration.
Useful Commands
A list of docker commands used in this post:
docker searchanddocker pull: lets you search the Docker Hub- for images and pull an image or a repository.
docker runanddocker stop: lets you run a command in a new- container and stop it.
docker rmanddocker rmi: lets you remove c container and an- image.
docker psanddocker images: lists running containers and- available images.
Extra bit:
docker exec: lets you run arbitrary commands inside an existing container.
To learn more about available flags run:
docker <command> --help
Usecases

Maybe some of you noticed I have not included docker build command
needed to build an image from a Dockerfile. As I stated at the
beginning of this post, the of this introduction to Docker is for the
reader to start using Docker today! Next, I will show how to
use Docker Hub so you can do just that. In this tutorial I will only
be using the official images.
How to RStudio
Since this is RLadies meetup let's start with RStudio. You can search
Docker Hub using the command line with already introduced docker
search. Rather than just looking for bare RStudio I will search for
one with tidyverse included.
>>>docker search tidyverse
NAME                              DESCRIPTION                                     STARS
rocker/tidyverse                  Version-stable build of R, rstudio, and R pa…   27
rocker/verse                      Adds tex & related publishing packages to ve…   15
rockerjp/tidyverse                rocker/tidyverse for Japanese R users.          2
andrewheiss/tidyverse-rstanarm    rocker/tidyverse with rstan, shinystan, and …   1
dceoy/r-tidyverse                 R with tidyverse                                0
adrtod/tidyverse-conda            R + tidyverse + anaconda 2                      0
felixleung/tidyverse_dl           Dockerfile for deep learning in Python and R    0
The output of our search query gives us repo name, short description and how many stars this image received (output is truncated). For this tutorial I will pull tidyverse image from the Rocker Project, a collaboration between Carl Boettiger and Dirk Eddelbuettel. It’s a great repository for R users, with collection of images for specific tasks. For example:
- tidyverse: adds tidyverse & devtools,
- verse: adds tex & publishing-related packages,
- geospatial: adds geospatial libraries.
Here for the first time we will see docker pull command in action.
>>docker pull rocker/tidyverse
Using default tag: latest
latest: Pulling from rocker/tidyverse
c73ab1c6897b: Pull complete
e6c768eab637: Pull complete
c81cc1fd93fa: Pull complete
ad933d792777: Pull complete
46144e37f37d: Pull complete
df2fa598d9cb: Pull complete
f4b0cc08f06a: Pull complete
Digest: sha256:9f55e338c494527648b187c9b8222f668bfe87d24bf3e50afe9fadaa60799a8a
Status: Downloaded newer image for rocker/tidyverse:latest
Each layer of our docker image is pulled separately as demonstrated by
the ‘pull complete’ statements. We can inspect our newly downloaded
image with docker images command:
>>>docker images
REPOSITORY       TAG     IMAGE ID      CREATED     SIZE
rocker/tidyverse latest  94e8a6128d1c  2 days ago  1.85GB
This will tell us how much disk space this image takes, when it was last updated by the creators and it’s tag. Let’s run it!
docker run -d -p 8787:8787 rocker/tidyverse
The -d and -p options mean we want to run this container in the
background and which port we want to expose to connect to the
application. To open Rstudio in a browser go to http://localhost:8787/
and log in with ‘rstudio’ and ta-dah! You can start working… There
is a small catch. Recall the part about read-write layer of a
container. Every time that container is stopped all files are lost.
To prevent that we have to mount a volume to our container with -v
flag. Let’s first stop our tidyverse container with docker stop
command. You can stop a container with its name or ID that you query
with docker ps.
>>docker ps
CONTAINER ID  IMAGE            COMMAND  CREATED       STATUS       PORTS
633f59afd22f  rocker/tidyverse "/init"  3 seconds ago Up 3 seconds 0.0.0.0:8787->8787/tcp
NAMES
serene_noyce
>>>docker stop serene_noyce
The -v or --volume flag consists of two fields separated by a
colon. The first field is the path to the directory on the host
machine and the second field is the path where the directory is
mounted in the container. If a directory does not exist on
the Docker host it will be created. Run the command below, login to
RStudio, navigate to /home/scripts directory, create a file and save
it. Then logout of RStudio and see if that file exists on your local
machine.
docker run -d -v /home/R:/home/scripts -p 8787:8787 rocker/tidyverse
How to TensorFlow with Jupyter
Jupyter notebooks are a popular option for sharing data science workflows and an increasing number of scientific papers is now accompanied by one in effort to make the research reproducible. Package and platform dependencies pose a significant barrier to reproducible research and docker seems as a great way out in this case. Jupyter Notebooks are also ideal to teach and learn with.
Jupyter project also has a repository on Docker Hub with the following offering:
- base-notebook
- minimal-notebook
- scipy-notebook
- r-notebook
- tensorflow-notebook
- datascience-notebook
- pyspark-notebook
- all-spark-notebook
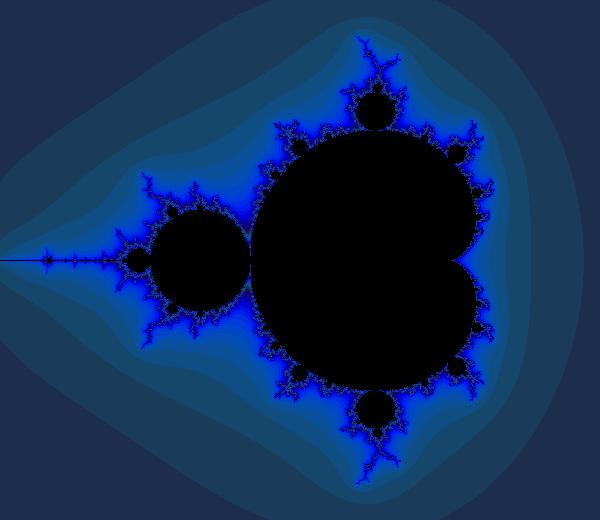
For this post I will pull the tensorflow-notebook. Warning, this image is quite big at almost 5GB. This notebook doesn’t have GPU support. For that I suggest you use tensorflow image from TensorFlow project. As a minimal example for this blog post I copied a tutorial on visualizing the Mandelbrot set from the official TensorFlow website.
We have to run this image in an interactive mode with a pseudo-TTY,
-it flag, so that we can get the token to launch the notebook.
The --rm flag automatically cleans up the container when you exit.
docker run -it --rm -p 8888:8888 jupyter/tensorflow-notebook
Now you can open jupyter notebook in your web browser. If you want to
mount a volume to this image add the -v flag with
/home/scripts:/home/jovyan/work/scripts. I bet you wonder how I knew
the directory structure of this docker image? This is where that extra
docker exec command comes in. To explore our tensorflow-notebook
container we will login to bash shell.
>>>docker run -d jupyter/tensorflow-notebook
018c71cdb8f7dcad1fb9f329f0e8309a6bf95a3a067d26303fa82cb928aa885e
>>>docker exec -it <containe_name> bash
jovyan@018c71cdb8f7:~$
Remember to stop your container when you are done with it.
How to python
If you are looking for something simple to try python you can pull official Docker python image.
>>>docker run -it python python
Python 3.6.5 (default, Mar 31 2018, 01:15:58)
[GCC 4.9.2] on linux
Type "help", "copyright", "credits" or "license" for more information.
>>>
The second python in the command will land you in python shell.
Since this is a bare bone python installation, to install packages with
pip, loose this second python. Bonus,
python repo has instructions
on how to run python applications using this Docker image.
How to TimescaleDB
Databases and Docker is somewhat a controversial subject. Some people are for it and some people are against it. In the end, it all depends on your application. The aim of this tutorial is to enable people to experiment and learn different software safely without the pain of sometime tricky installations. OK, lets look at PostgreSQL, whatever you choose to pronounce it, and TimescaleDB.
I would like to introduce you to TimescaleDB, an open-source time-series database that natively supports SQL engine. It looks and feels like PostgreSQL, but is optimised for high speed ingest. Pull timescaledb image from the timescale repository.
Run your image with the following command. If you are getting errors about bind and addresses try different port.
docker run -d --name timescaledb -p 5432:5432 timescale/timescaledb
You have two options here, you can login to the timescaledb container
with exec command if you have postgres installed on your machine.
Otherwise you will have to stop this container and run it without -d
option. I will assume you have postgres installed. Lets run it as a
postgres user.
docker exec -it timescaledb psql -U postgres
Now you can try some of the tutorials on the timescale website. You can always come back to your work by starting this container again.
docker start timescaledb
What next?
If you pulled all images from this guide the output of your docker
images query should look something like this:
>>>docker images
REPOSITORY                    TAG     IMAGE ID      CREATED       SIZE
rocker/tidyverse              latest  94e8a6128d1c  7 days ago    1.85GB
jupyter/tensorflow-notebook   latest  b31737ac2c3c  8 days ago    4.73GB
python                        latest  efb6baa1169f  2 weeks ago   691MB
timescale/timescaledb         latest  9976df335316  3 weeks ago   39.4MB
I encourage you to use the hub, play with images, look what’s there. Just use it, so that next time we meet we will chat about your experiences with the hub. My hope is it will help you narrow down what is your usecase. For example, 'this RStudio image is great, but if it already had this package, so I don’t have to install it every time, my life would be much easier’.
See you next time!